
Free Crochet Cat Pattern (with Video Tutorial)
Aug 30, 2025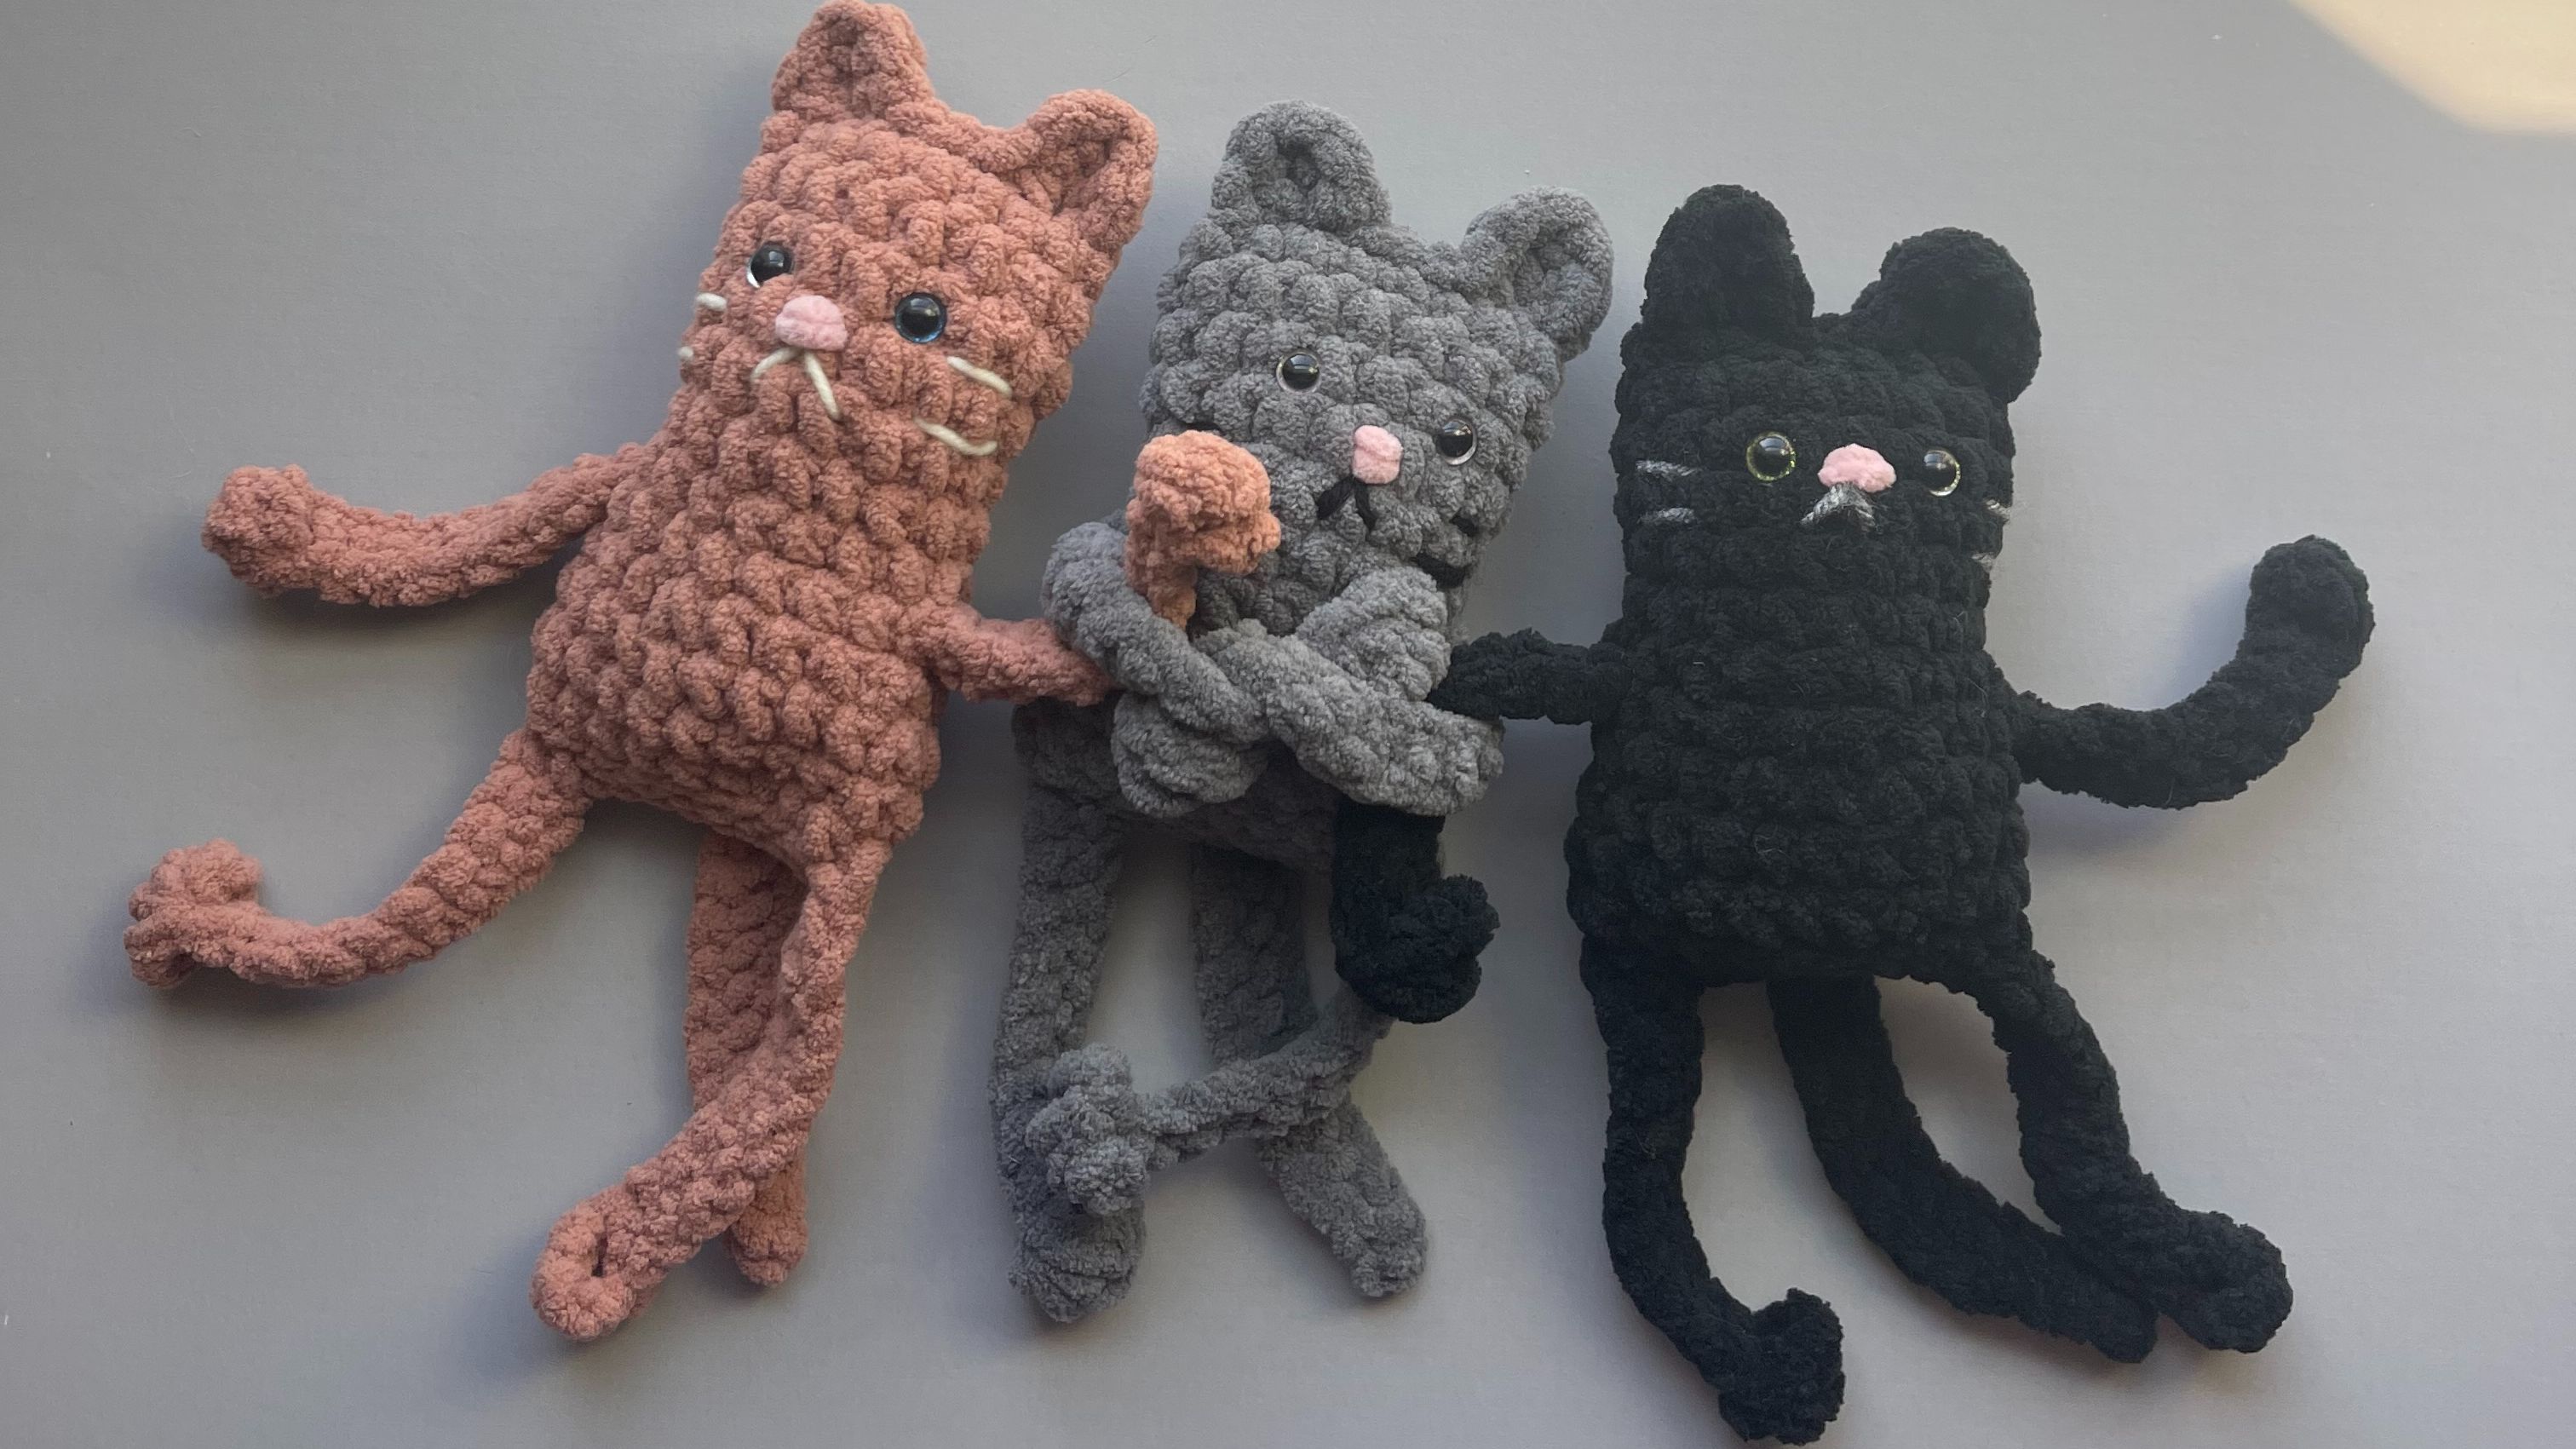
Free Crochet Cat Pattern (with Video Tutorial)
Looking for a cute and easy crochet cat pattern? This free amigurumi tutorial is perfect for beginners and experienced crocheters alike. Whether you’re making a plush toy for kids, a handmade gift for a cat lover, or stocking up for your next craft fair, this project is fun, quick, and customizable.
In this post, you’ll find both the written pattern and a step-by-step video tutorial so you can follow along however you like.
Why You’ll Love This Crochet Cat Pattern
-
Beginner-friendly amigurumi project
-
Works up quickly with minimal yarn
-
Customizable colors (tabby, black cat, calico, or even rainbow!)
-
Perfect gift for cat lovers or a best-seller at craft fairs
Finished Size
9 inches tall, 3 1/2 inches wide
Materials Needed
-
#6 Chunky Blanket Yarn (color for cat) and a small bit of pink (nose and ears)
-
12 inch piece of medium weight black or white yarn (for mouth and whiskers)
-
fiberfill stuffing
-
Stitch Marker
-
Yarn Needle
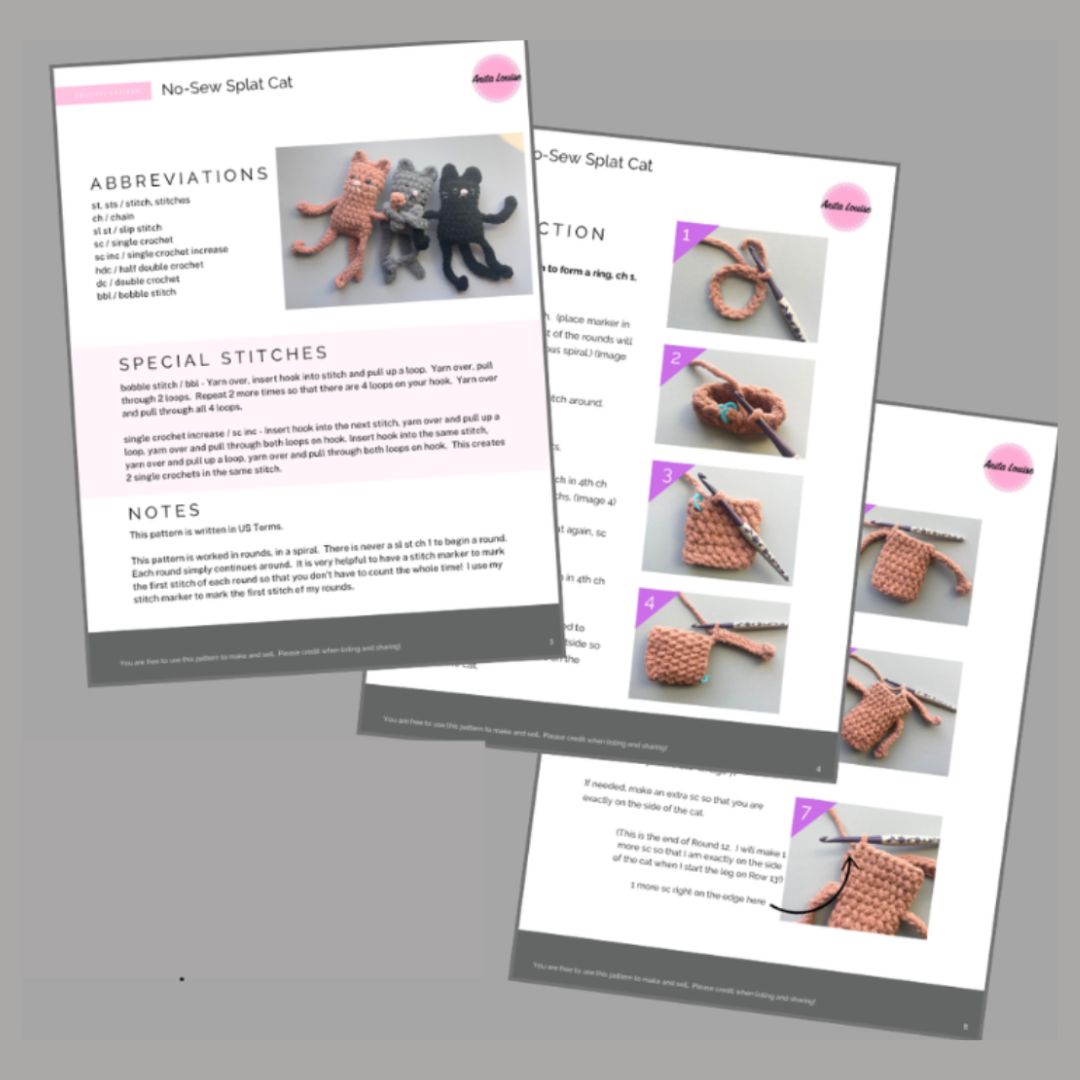
You can purchase the PDF, complete with lots of helpful pictures HERE or get the free version below.
Crochet Cat Pattern (Written Instructions)
Special Stitches: bobble stitch / bbl – Yarn over, insert hook into stitch and pull up a loop. Yarn over, pull through 2 loops. Repeat 2 more times so that there are 4 loops on your hook. Yarn over and pull through all 4 loops.
Ch 16, sl st to first ch to form a ring, ch 1.
Round 1: Sc in each ch. (place marker in first sc because the rest of the rounds will be worked in a continuous spiral.) (16)
Round 2 – 6: sc in each stitch around. (16)
Round 7: Sc in the next 8 sts. Make arm: Ch 14. bobble stitch in 4th ch from hook. Sc in the next 10 chs. Working on the body of the cat again, sc in the next 8 sts. Repeat arm. Ch 14. bobble stitch in 4th ch from hook. Sc in the next 10 chs. On the next 2 rounds, you will need to push the arms of the cat to the outside so that you can place all of the sc on the body of the cat.
Round 8: Sc around. (16)
Round 9: *(Sc in next 3 sts, sc inc in the next st.) Repeat from * around. (20)
Round 10: Sc around (20)
Round 11: Sc in the next 5 sts. Make tail: Ch 14. Sl sl in the 2nd chain from the hook and in the next 2 chs. Sc in the next 10 chs. Working on the body of the cat again, sc in the next 15 sts.
Round 12: Sc around. (20) On this round, you will need to push the tail of the cat to the outside so that you can place all of the sc on the body of the cat. If needed, make an extra sc so that you are exactly on the side of the cat.
Row 13: Make leg: Ch 14. bobble stitch in 4th ch from hook. Sc in the next 10 chs.
Now we will be sewing the bottom of our cat closed: fold cat so that the open stitches on the bottom are together. Take the first 2 stitches that are closest to the leg just made, sl st through the back loops only. Continuing with back loops only, sl st the next 8 stitches together.
Make another leg: Ch 14. bobble stitch in 4th ch from hook. Sc in the next 10 chs.
Sl st the last 2 sts together to close up your cat. Cut yarn and weave in end.
Face Details: Place safety eyes between rows 3 and 4, about 3 stitches apart. With pink blanket yarn, stitch a nose one row under eyes. With black or white medium weight yarn, stitch a mouth under the nose and 2 or 3 whiskers on each side of the face. Stuff cat with a handful of poly-fil stuffing.
Ears: Now we will sew the cat head closed and add ears! We will be working into the unworked loops of the starting chain and working through both layers (front and back of the head) at the same time to sew it closed.
Starting in the two unused loops of the starting ch that are the farthest to the right, draw up a loop of yarn and ch 1. Working across the remaining chains on the top of the head, (hdc, 2 dc, hdc). sl st in the next 4 ch. (hdc, 2 dc, hdc), sl st in the last ch. Cut yarn and finish off!
Video Tutorials 🎥
Follow along step-by-step with the crochet cat video tutorial—perfect if you’re a visual learner or new to amigurumi.
Right Handed Video Tutorial:
Left Handed Video Tutorial:
Crochet Cat Variations
-
Black cat for Halloween
-
Calico cat with different yarn scraps
-
Mini cat keychain (use smaller yarn and hook)
Final Thoughts
This free crochet cat pattern is quick, cute, and perfect for any cat lover. Once you make one, you’ll want to create an entire litter of cats in different colors and styles. Whether you’re crocheting for fun, for gifts, or for your handmade shop, this cat is sure to be a favorite.
🐾 Happy crocheting!