
Crochet Rainbow Plushie – Pattern + Video Tutorial
Jan 17, 2026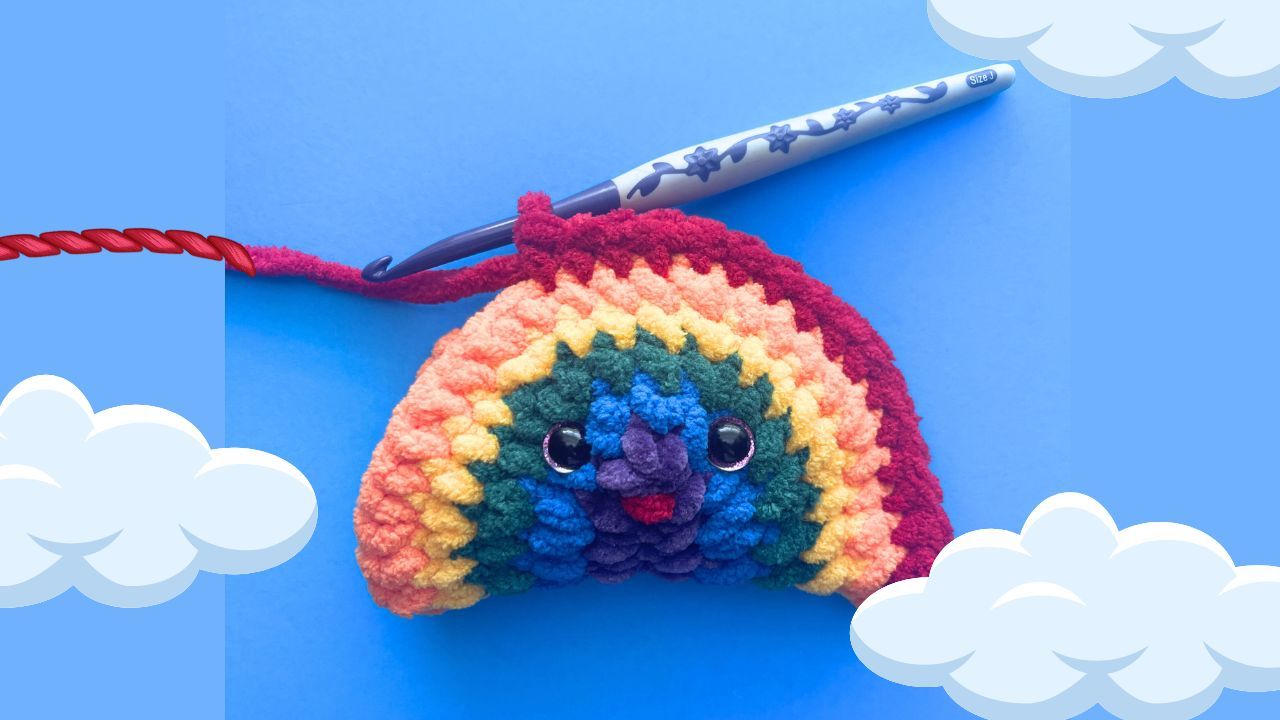
🌈 Crochet Rainbow Plushie – Pattern + Video Tutorial
Bring a pop of color to your crochet projects with this crochet rainbow plushie! Bright, cheerful, and squishy, this beginner-friendly plushie is the perfect handmade gift for kids or décor for nurseries or your home. It pairs beautifully with a cloud or sun plushie for a whimsical weather set.
The printable PDF pattern is available in my Etsy shop, and you can follow along with the step-by-step video tutorial on my YouTube channel.
✨ Why You’ll Love This Crochet Rainbow Plushie
-
Beginner-friendly with simple stitches
-
A colorful, fun project that’s great for stash-busting yarn
-
Perfect for nursery décor or gifts
-
Easy to customize with your favorite color combinations
🧶 Crochet Rainbow Plushie Pattern Details
Materials Needed:
-
#6 Bulky blanket yarn in red, orange, yellow, green, blue, and purple (or any colors you choose!)
-
6.0 mm / J crochet hook
-
Fiberfill stuffing
-
Yarn needle
-
Scissors
- 12 mm Safety eyes
Instructions:
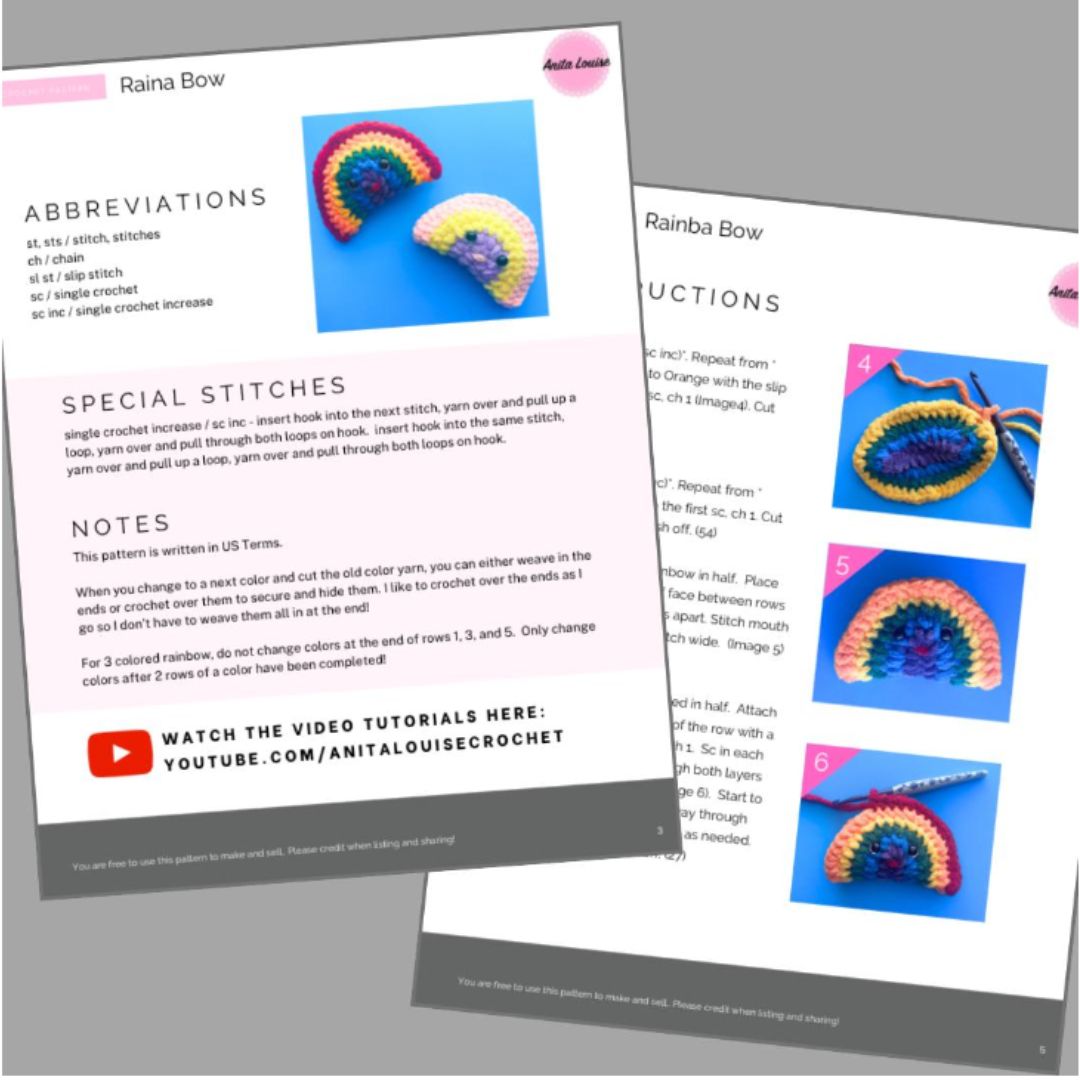
Note: For 3 colored rainbow, do not change colors at the end of rows 1, 3, and 5. Only change colors after 2 rows of a color have been completed!
Start with Purple. Ch 9.
Round 1: Sc in 2nd ch from hook. Sc in the next 6 ch. 3 sc in the last chain. Working on the other side of the chain, sc in the next 6 chains. 2 sc in the last ch. Change to Blue with the slip stitch to the first sc, ch 1. Cut Purple yarn. (18)
With Blue:
Round 2: (sc, sc inc)*. Repeat from * around. Change to Green with the slip stitch to the first sc, ch 1. Cut Blue yarn. (27)
With Green:
Round 3: (2 sc, sc inc)*. Repeat from * around. Change to Yellow with the slip stitch to the first sc, ch 1. Cut Green yarn. (36)
With Yellow:
Round 4: (3 sc, sc inc)*. Repeat from * around. Change to Orange with the slip stitch to the first sc, ch 1. Cut Yellow yarn. (45)
With Orange :
Round 5: (4 sc, sc inc)*. Repeat from * around. Slip stitch to the first sc, ch 1. Cut Orange yarn and finish off. (54)
Face Details: Fold rainbow in half. Place safety eyes on sides of face between rows 2 and 3, about 3 stitches apart. Stitch mouth 1 stitch below eyes, 1 stitch wide.
With Red:
Row 6: Keep rainbow folded in half. Attach Red yarn at the beginning of the row with a sl st through both layers. Ch 1. Sc in each stitch across, working through both layers to close the rainbow up. Start to stuff the rainbow about halfway through this round. Add more stuffing as needed. Cut Red yarn and finish off. (27)
💡 Creative Ideas for Your Rainbow Plushie
-
☁️ Weather Set: Pair with a cloud and sun plushie for a cute décor set.
-
🍼 Baby Nursery: Brighten a child’s room with a soft, colorful toy.
-
🎁 Handmade Gift: Perfect for birthdays, showers, or just because!
📄 Get the Pattern + Tutorial
-
PDF Pattern: Available in my Etsy shop for ad-free, printable instructions.
-
Video Tutorial: Step-by-step instructions on my YouTube channel.
Right Handed Video Tutorial:
Left Handed Video Tutorial:
🌟 More Crochet Plushie Patterns
If you loved this rainbow, you might also enjoy:
Final Thoughts
This crochet rainbow plushie is bright, colorful, and full of joy! Whether you make it for décor, a gift, or to celebrate something special, it’s sure to bring a smile. Pair it with other plushies for the ultimate weather-inspired crochet collection.
Happy Crocheting,
— Anita Louise 🧶